

I knew before starting this project that it might be beyond my sewing skills but given the price point when I searched French Mattresses on Etsy, I figured it was worth a shot. After much googling and a trip down the rabbit hole that is YouTube’s how to videos, I had a general sense of the steps needed to make my French Mattress.
While there are many great tutorials on how to construct a French mattress, the two primary ones that I used as my guide in making my cushion were:
She Holds Dearly | French Mattress Cushion Tutorial : This video was a great overall tutorial on all of the steps used to create a French Mattress.
Online Fabric Store | How to Make a French Mattress Cushion : I liked the way they did the stitching in this video tutorial and used it as my stitching guide.
Eventually, I had to stop researching how to do it and just jump into the project. My first stop was Marden’s Surplus and Salvage which is a chain of discount retail stores in Maine with the tag line, “I should have bought it, when I saw it, at Marden’s…” It is an accurate slogan. Their merchandise is always turning over and the deals are amazing. Their Portland, Maine store has an extensive fabric and notions section.
On my visit, I found everything I needed for my French mattress at an amazing price. Being unsure as to how this project would turn out, I was relieved not to spend a lot on the supplies. I found an upholstery material in a striped pattern to give the mattress a slightly sophisticated ticking feel along with a 2″ foam cushion and batting for the base. I was ready to go.
When I got home, I needed to cut the cushion to the size of the bench which was 12″x 36″. I used a square ruler to mark off the size with with a sharpie and then I was ready to cut. Most tutorials recommend using an electric bread knife for this step. Since I don’t own one, I initially tried using a regular bread knife with a serrated edge. This went extremely poorly. After less than an inch of cutting, I gave up and switched over to my sewing shears. While I had to do a little maneuvering to get the scissors at the angle I needed to make my cuts, it was manageable. If I were working with a thicker cushion, I don’t think I would have been able to use the scissors but fortunately they worked for the 2″ foam.
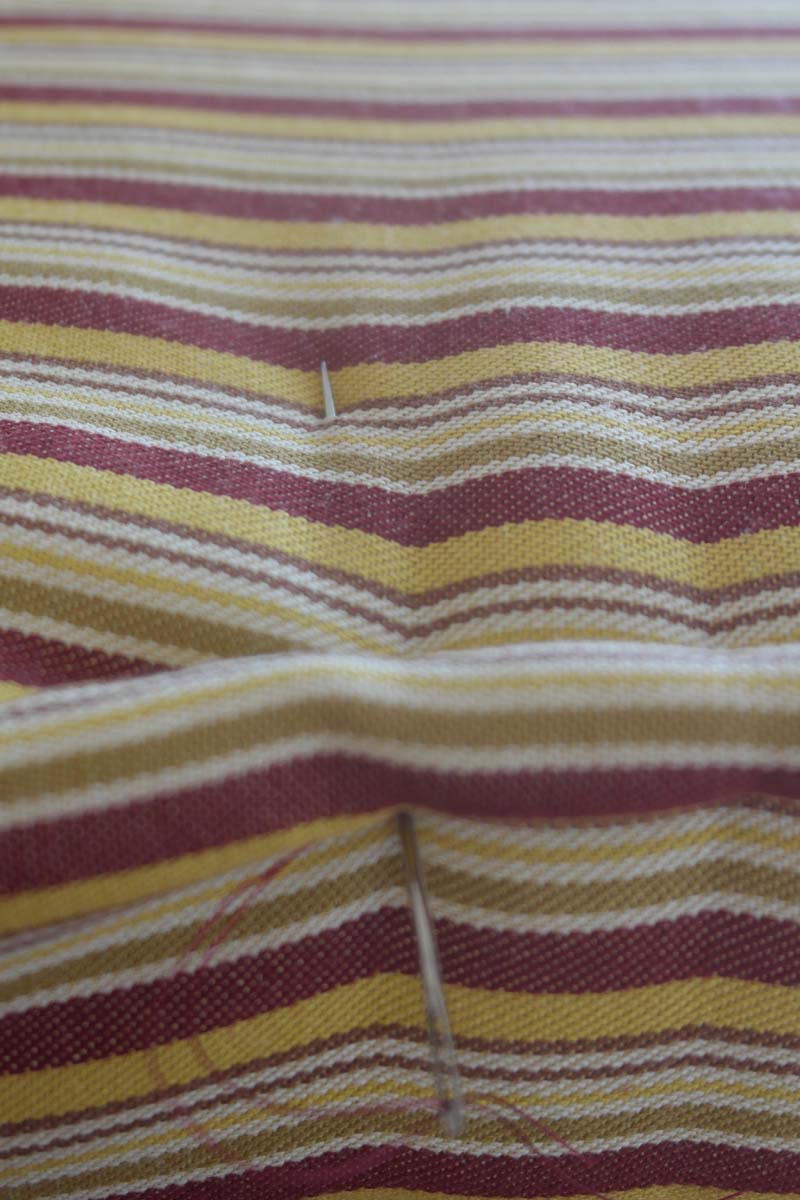
The next step was attaching the batting around the cushion. Most tutorials recommend using spray glue to attach the batting. All the cans of spray glue that I own, and there are many, were clogged and not actually spraying so I ended up just using white glue to attach the batting. I held it in place with straight pins while the glue dried.


And then…
The materials sat on my kitchen table for about a week. I was intimidated by the stripes in the fabric that I had select. I couldn’t quite figure out the best way to cut the material for my box cushion and have everything match correctly. I never did find a solution even after many evenings spent googling the issue. It was time to jump in without a plan.
If you want to make a box cushion, I highly recommend you find another tutorial This is not going to be helpful in the least on how to make one correctly. I didn’t make a pattern. I barely measured my fabric. I pinned it around the cushion and drew a rough line to follow on the sewing machine. I hand sewed three sides using a blind stitch after wrapping the fabric around the cushion because it was more accurate than trying to do my “rough seams”.


Miraculously, I ended up with a serviceable box cushion. It did have one wonky corner that I undid the sewing on and tried to make a little more square. Unfortunately, I’d trimmed the material too much and only had a little bit of leeway in my adjustment. Knowing I would be doing the French mattress stitching around the edges, I hoped I’d be able to hide the mistake.


While the tutorials recommend marking the mattress stitching along the edges, I ended up using my tape measure as I went along the edge to keep things spaced mostly even. I used about 1 1/4″ between the stitches with a 1″ space on the top and bottom to make my tuft. While the striped fabric was challenging when sewing the actual cushion, it ended up being extremely helpful when hand sewing around the edges. I had stripes to guide me with making even stitches.
")
")

I spent the next four nights working my way around the outer edges. I’ll never again say that the cost of buying a French Mattress on Etsy is too high. If anything, I think they’re undercharging.
Because I was working on a smaller cushion, I was able to do this stitching by hand without much difficulty. I know a lot of sites recommend gloves, or other hand protection as it can really be painful on the hands but I didn’t have any issues. Well, there was one small incident where I drew blood. I didn’t feel it and fortunately, realized just as I was starting to bleed all over the fabric. I caught my nick in the nick of time.
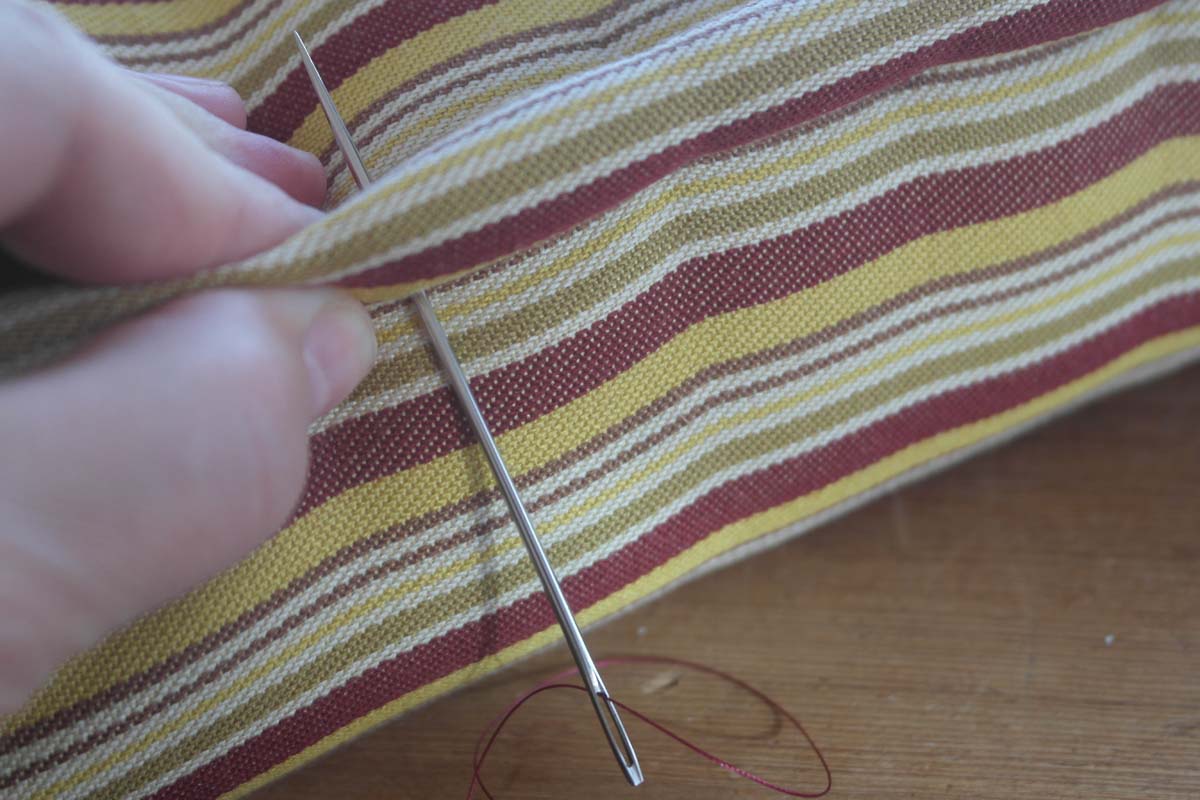
The basic stitch that I used is shown below:
Step 1) Pinch the material together with your fingers and push the needle through leaving about an inch on both the top and bottom. The thread should be doubled up.
Step 2) Bring the needle back through the top about 1/4″ from where it came out on the top.
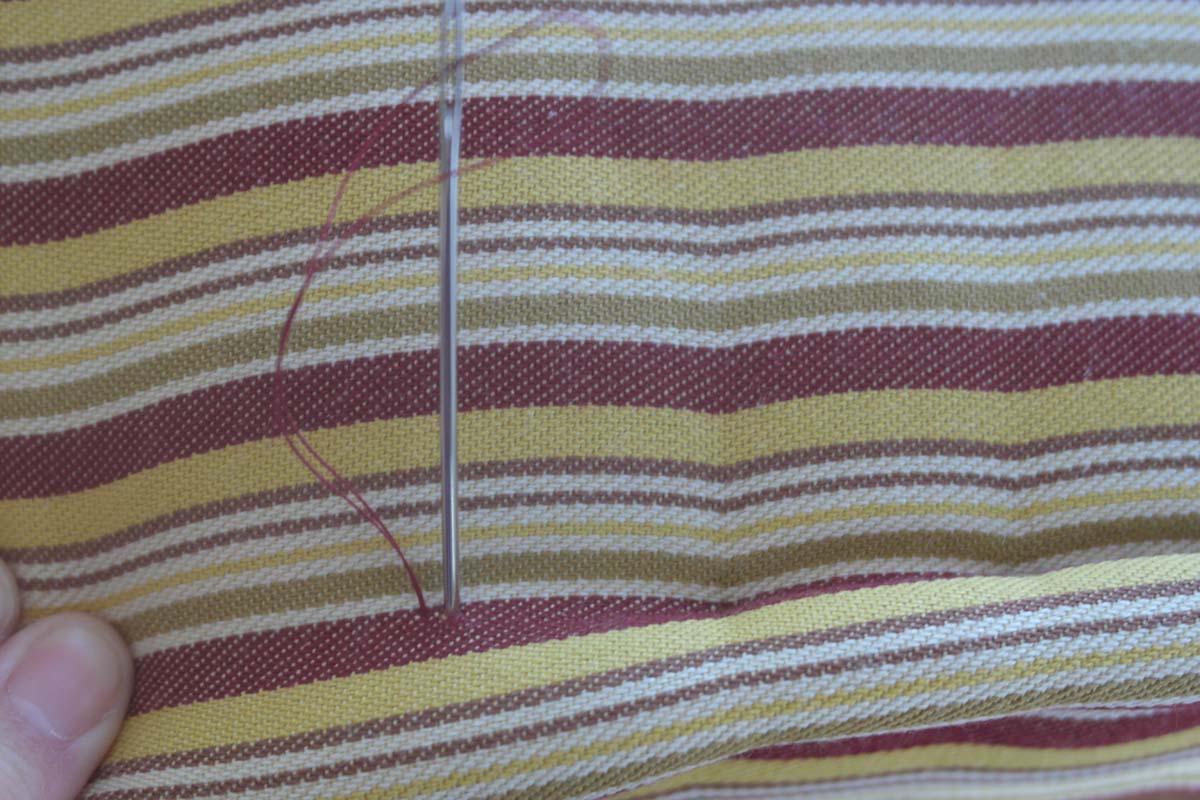
Step 3) Come out in the same place you came into the fabric on the bottom.
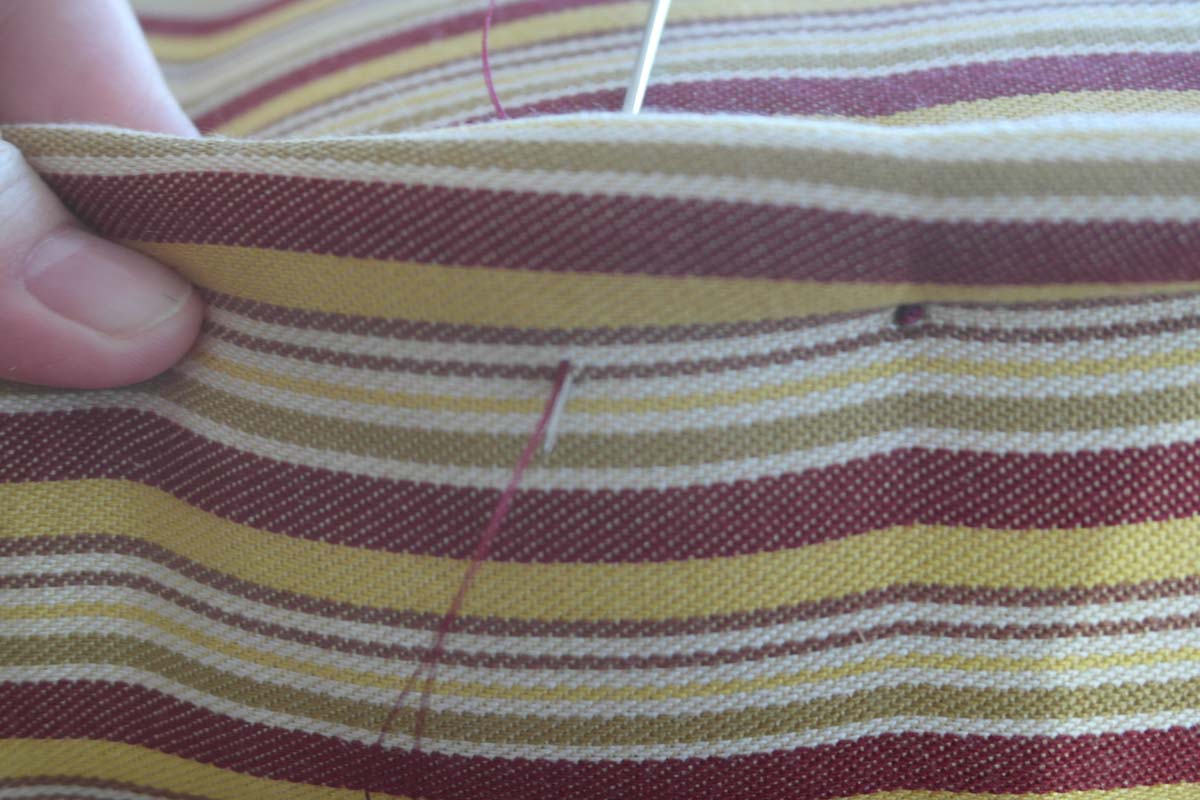
Step 4) Use a slip knot to tie the thread together. Pull the stitching tight to create the bunched mattress edge. Add additional knots to reinforce.
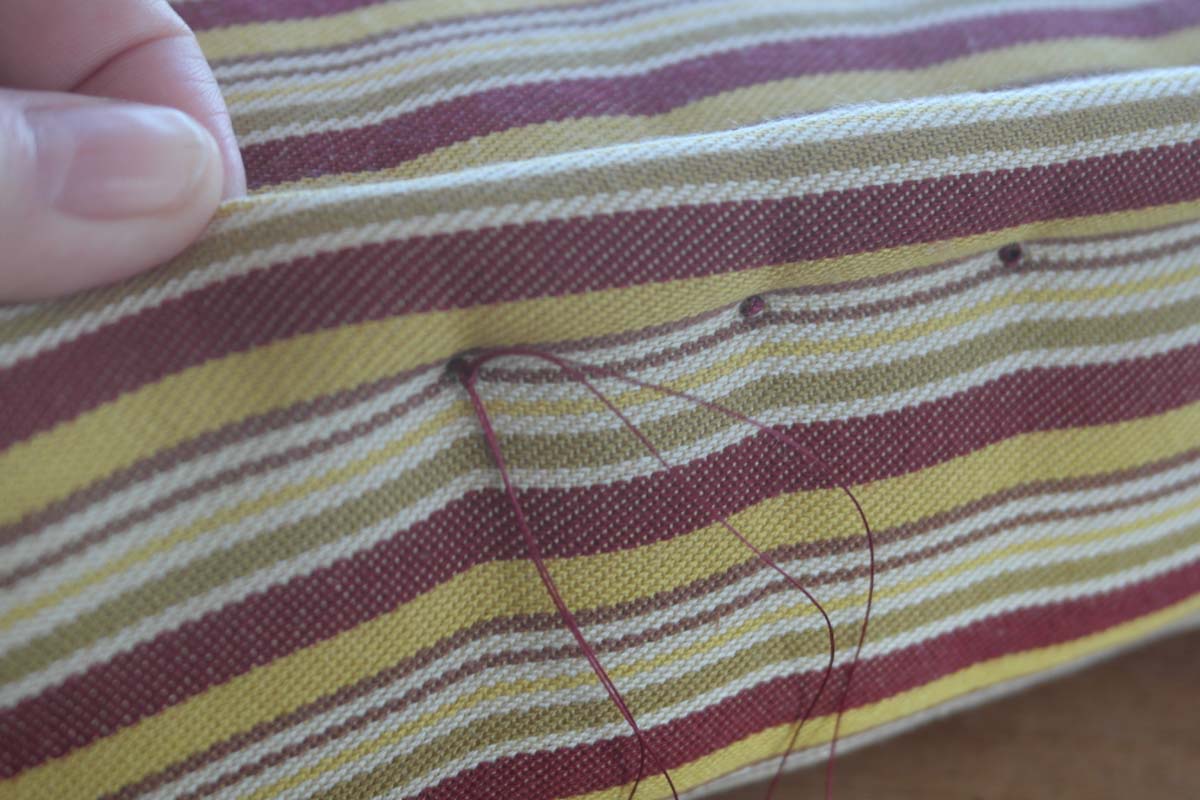
Step 5) Use the need to pull the extra thread back into the cushion. Push the needle in behind the knot and come out anywhere on the top. I usually did two threads at a time using this method.
Step 6) Pull the thread tight and then cut close to the fabric. The thread will disappear back into the mattress.

After stitching the outer edges of the top and bottom of the cushion, I was excited to see that I had the makings of a decent French Mattress. Even my wonky corner was barely visible under all the edge stitching.


")

I still need to add the tufting to the center to give it the full French mattress look but I need to think on that piece a bit. I’m not sure my fabric weave will stand up to the upholstery thread being used to tighten the tuft so I’m leaning towards adding buttons.
The thing is I’ve never used upholstery buttons so it’s back to that YouTube rabbit hole for me.
Do you like the look of a French mattress?
I’m participating in a Blogging A-Z Challenge for April 2021. I will be posting new content every day this month except most Sundays. Each post is associated with a letter of the alphabet, starting with A and ending with Z. My theme for the challenge is Craft Projects for my Home. To read more of my A to Z posts from this year, click HERE.


The French mattress and the bench look like a marriage made in heaven. They go so perfectly. I’m sure your photos will make the best tutorial for anyone who wants to try it out. I can see how you ‘escape’ into your projects. Lovely.
Chuckled at: “Eventually, I had to stop researching how to do it and just jump into the project.” It’s the tricky bit for me:)
LikeLiked by 1 person
It really is challenging to stop myself when I’m in “research” mode sometimes. But, that’s also part of the fun!
LikeLike
That is beautiful! I consider myself fairly crafty and I had never heard of a French mattress until I read your post. I can google it but is it called that because of the seams around the edge? When my kids were little and I sewed for them, we used French seams which are sort of like the edges except on the underside.
LikeLiked by 1 person
Yes, the stitching around the edge is what gives it the final mattress like look. I think when I add the center tufts it will look even more like one too.
LikeLike
I was unaware of the French mattress, but I must say, it does look nice. What a lot of work though! Well done.
LikeLiked by 1 person
It’s was definitely a bit of a reach for my skills so I’m probably not going to open a French mattress site on Etsy anytime soon but I’m glad I have this one!
LikeLiked by 1 person
That’s a lot of work and patience and perseverance I must say …love the fabric and it has come out well ….
And you have included so many detailed pictures. Nice
https://pagesfromjayashree.blogspot.com/2021/04/flavors-and-food-banana-leaf-meals.html
LikeLiked by 1 person
This one did take me a while to finish but once I got into the groove with the stitching it wasn’t too bad.
LikeLike
Wow, you have taken it to the max indeed. Congratulations on that masterpiece!
What I wanna know: if you sit on it long enough, will you speak French fluently? Or how does it work exactly?
https://thethreegerbers.blogspot.com/2021/04/a-z-2021-dont-look-to-floor-for-pennies.html
LikeLiked by 1 person
Wouldn’t that be a cool trick? Sadly, no such luck. The only advantage, if you sit on it, is that you’ll be comfortable.
LikeLike
I wasn’t familiar with the term “French mattress” so your post was doubly educational. What a lovely job you did! I’m giving you a kajillion extra points for tackling this project using striped material. I’m definitely not the most skilled at sewing, and I know my stripes would have ended up entirely wonky and people would probably get dizzy just looking at it.
LikeLiked by 1 person
I think the stripes are why I was so afraid to start. When they don’t line up, they really are so distracting. I breathed a heavy sigh of relief once the cushion was sewn and they were straight.
LikeLiked by 1 person
Oh, I didn’t know it was named French mattress ;)) In France we name this kind of mattress a padded mattress, or “matelas capitonné”. Very comfortable, and I love yours, very well done! Wonderful!
Quilting Patchwork & Appliqué
LikeLiked by 1 person
I only learned of them fairly recently when I started thinking about a new cushion for my bench and I just fell in love with the style. They have such personality plus they really are comfortable.
LikeLike
Looks amazing, and you make it sound so simple – I bet if I tried it, it wouldn’t end up looking anything like that!
LikeLiked by 1 person
This one was a bit intimidating. I was so happy it came out and I didn’t have a giant mess on my hands.
LikeLiked by 1 person
My first step would have to be googling, “What is a French mattress?” I’d never heard of it.
Yours looks wonderful! Good job with the stripes! I’m not much of a seamstress, so I avoid stripes when shopping for fabric.
LikeLiked by 1 person
I wanted that ticking look so gave the stripes a shot for this project but agree avoiding stripes is a good policy. It’s generally mine too. They can be so difficult to match.
LikeLike
Wow, what a project! I didn’t even know what a French cushion is before this…
The Multicolored Diary
LikeLiked by 1 person
It took a while to finish but I’m so happy to have my new bench cushion now.
LikeLike
I do like the look of a French mattress. But I’m exhausted just reading about all the steps you went through to create yours. Your hard work shows.
https://gail-baugniet.blogspot.comFlash
F for Fractured Fairy Tales – Wed
G for Green Flash of Sunset – Thurs
LikeLiked by 1 person
It was a lot of steps but once I got into the groove with the stitching it wasn’t too bad.
LikeLiked by 1 person
That is actually quite cool, I wonder if this can be done with waterproof material, it would probably make it harder to stitch…*thinking*
LikeLiked by 1 person
I bet you could do it with waterproof material. You might need to use the hand protection as it would be a little harder to get the needle through but with the right tools it would work and opens up some cool possibilities.
LikeLiked by 2 people
I like the look of it but not the work that you had to put into it. the final outcome is a credit to you. Have you found it hard to find electric carving knives…I looked a while ago and they seem to have disappeared.
Pauleen aka Cassmob
https://cassmobfamilyhistory.com
Family History across the Seas
LikeLike
I haven’t seen an electric knife in a long time. I think you are right that they may be going out of fashion. I’m surprised I haven’t seen more of them at the thrift stores.
LikeLiked by 1 person
Wow, great post! I’ve been on an upholstery jag since last summer. Just scored some great upholstery fabric at a resale shop. Want to make cushions for our dining room chairs. This is JUST what I needed to see. Your piece turned out beautifully! Detail pictures are very helpful.
I think you know what my “U” is going to be.
LikeLiked by 1 person
I can’t wait to see how your upholstery project comes out. I have some bar stools that are next on my list.
LikeLiked by 1 person
The thing that you did well was to take your time! Your efforts are very well done. If you ever (I say this with caution) try a thicker foam, you might do well with electric scissors? I’m missing everyone this year on the A to Z but decided I shouldn’t participate if I didn’t have time to do the visiting. Have a great rest of the challenge!
LikeLike
I think electric scissors would be helpful on thicker foam. I don’t seem them around much anymore though. I’ll have to keep my eyes out.
LikeLiked by 1 person